9 Globus
9.1 Overview
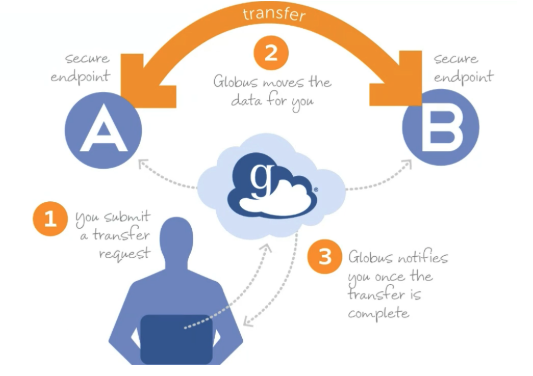
Globus is a secure, point-to-point file transfer platform. Data flows directly between endpoints — it never passes through Globus servers. This makes transfers reliable, fast, and encrypted even for very large datasets.
9.2 Key Concepts
| Term | Definition |
|---|---|
| Endpoint | A computer or server that can send or receive data via Globus |
| Collection | A named set of files and folders accessible through Globus |
| Globus Connect Server | Infrastructure connecting storage systems (HPC, Google Drive) to Globus |
| Globus Connect Personal | Desktop app that turns your laptop into a Globus endpoint |
| Globus Plus | Enhanced subscription enabling external sharing and multi-endpoint sync |
9.3 When to Use Globus
Use Globus for:
- Datasets larger than 1 GB
- Transfers between HPC clusters or institutions
- Sharing data with collaborators at other universities
- Automated or scheduled transfers
For files under 100 MB, SCP or OnDemand is simpler.
9.4 Getting Started
9.4.1 Create an Account
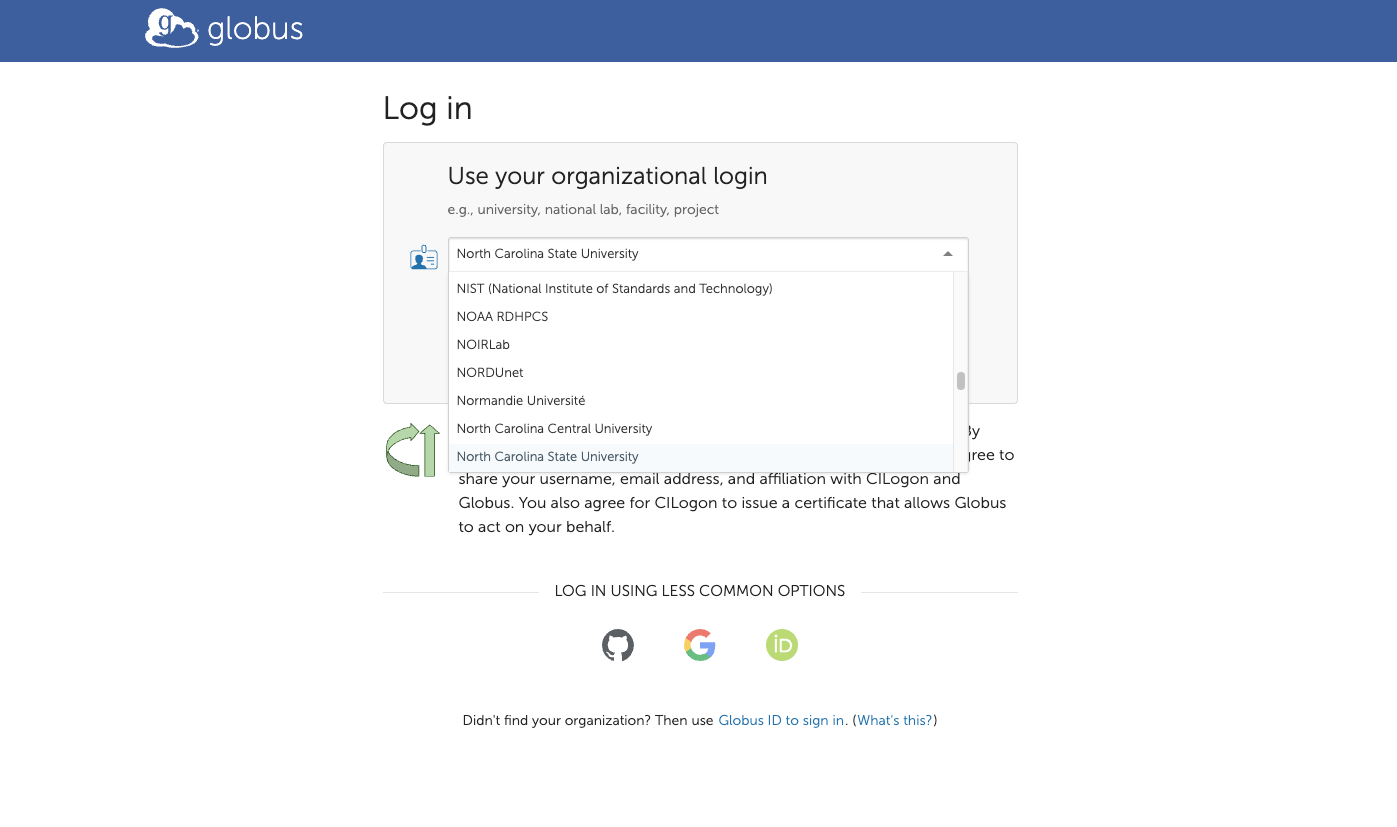
- Go to https://www.globus.org and click Log In
- Search for North Carolina State University
- Authenticate with your NCSU (Unity ID) credentials
- Complete first-time setup prompts
9.4.2 Connect Your NCSU Google Drive
Go to Collections on the Globus website
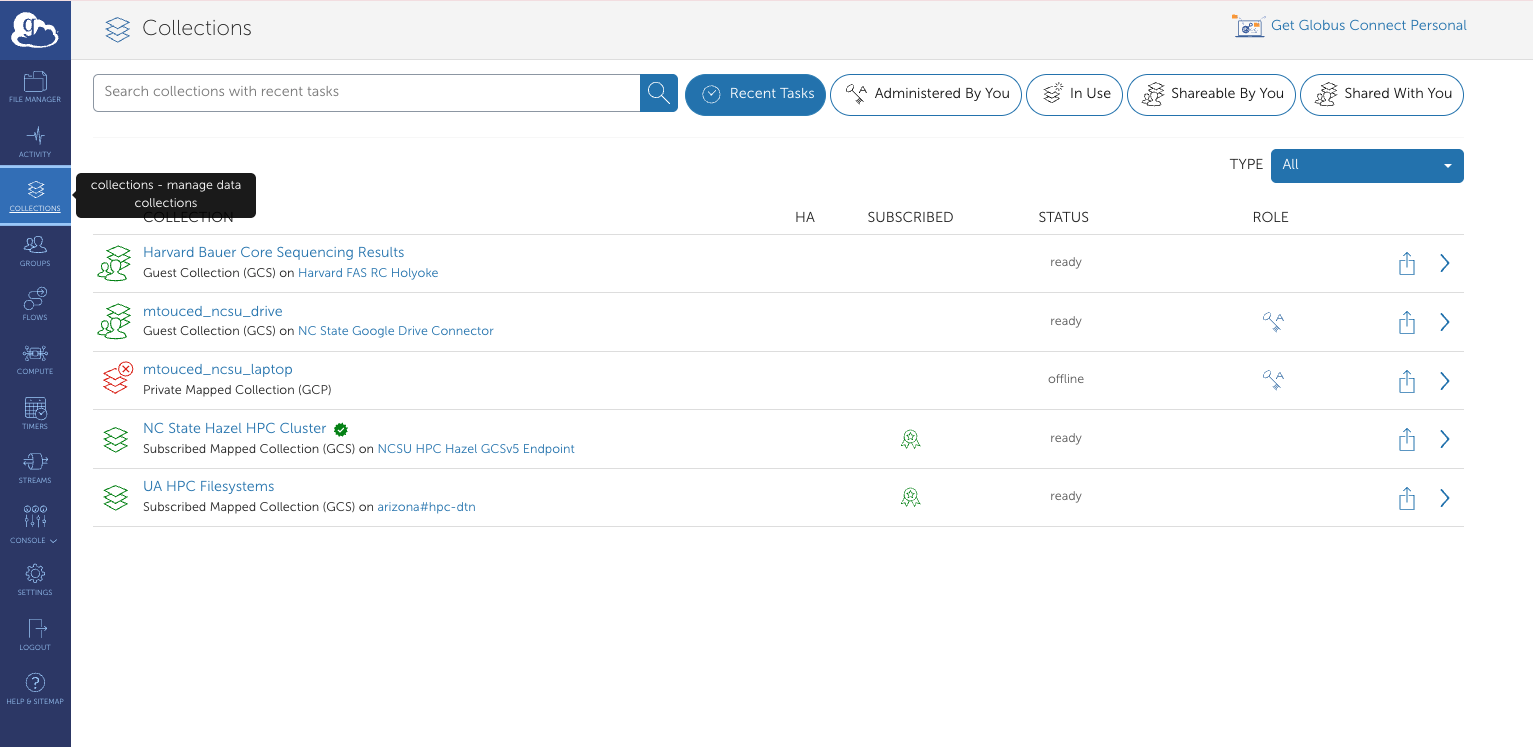
Collections page Search for
ncsu google→ click NC State Google Drive ConnectorClick Collections → Add Guest Collection
Grant permissions when prompted
Select a directory, enter a display name (e.g., “My Research Data 2025”), and click Create Collection
9.4.3 Connect Your Local Machine
Download Globus Connect Personal from the Collections page (link in top right)
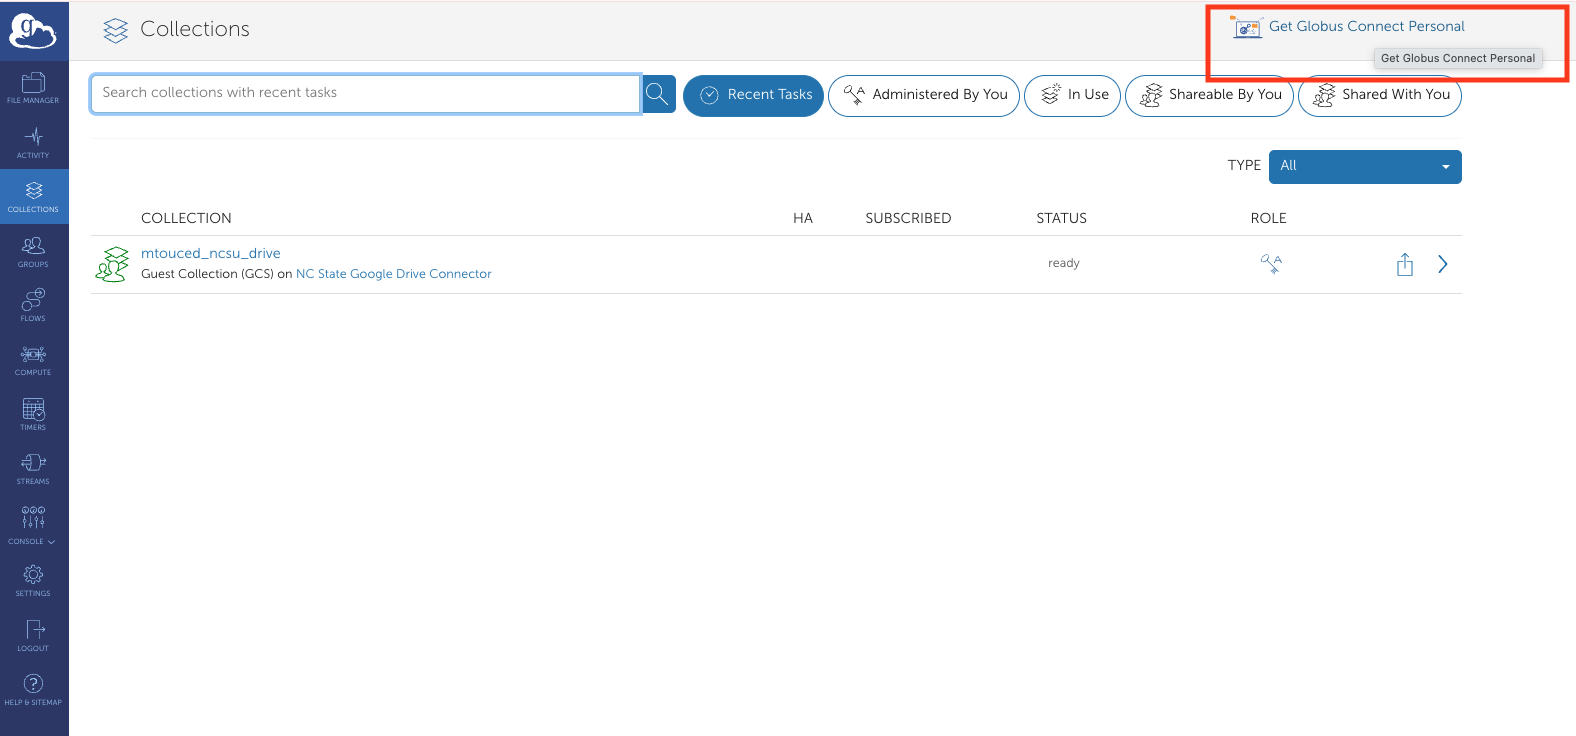
Globus Connect Personal download Install and launch; log in with NCSU credentials (browser popup)
Enter a display name for your machine (e.g., “My-Laptop”)
Your machine now appears under Collections.
9.5 Transferring Files
Open File Manager
Set your source collection (left) and destination collection (right)
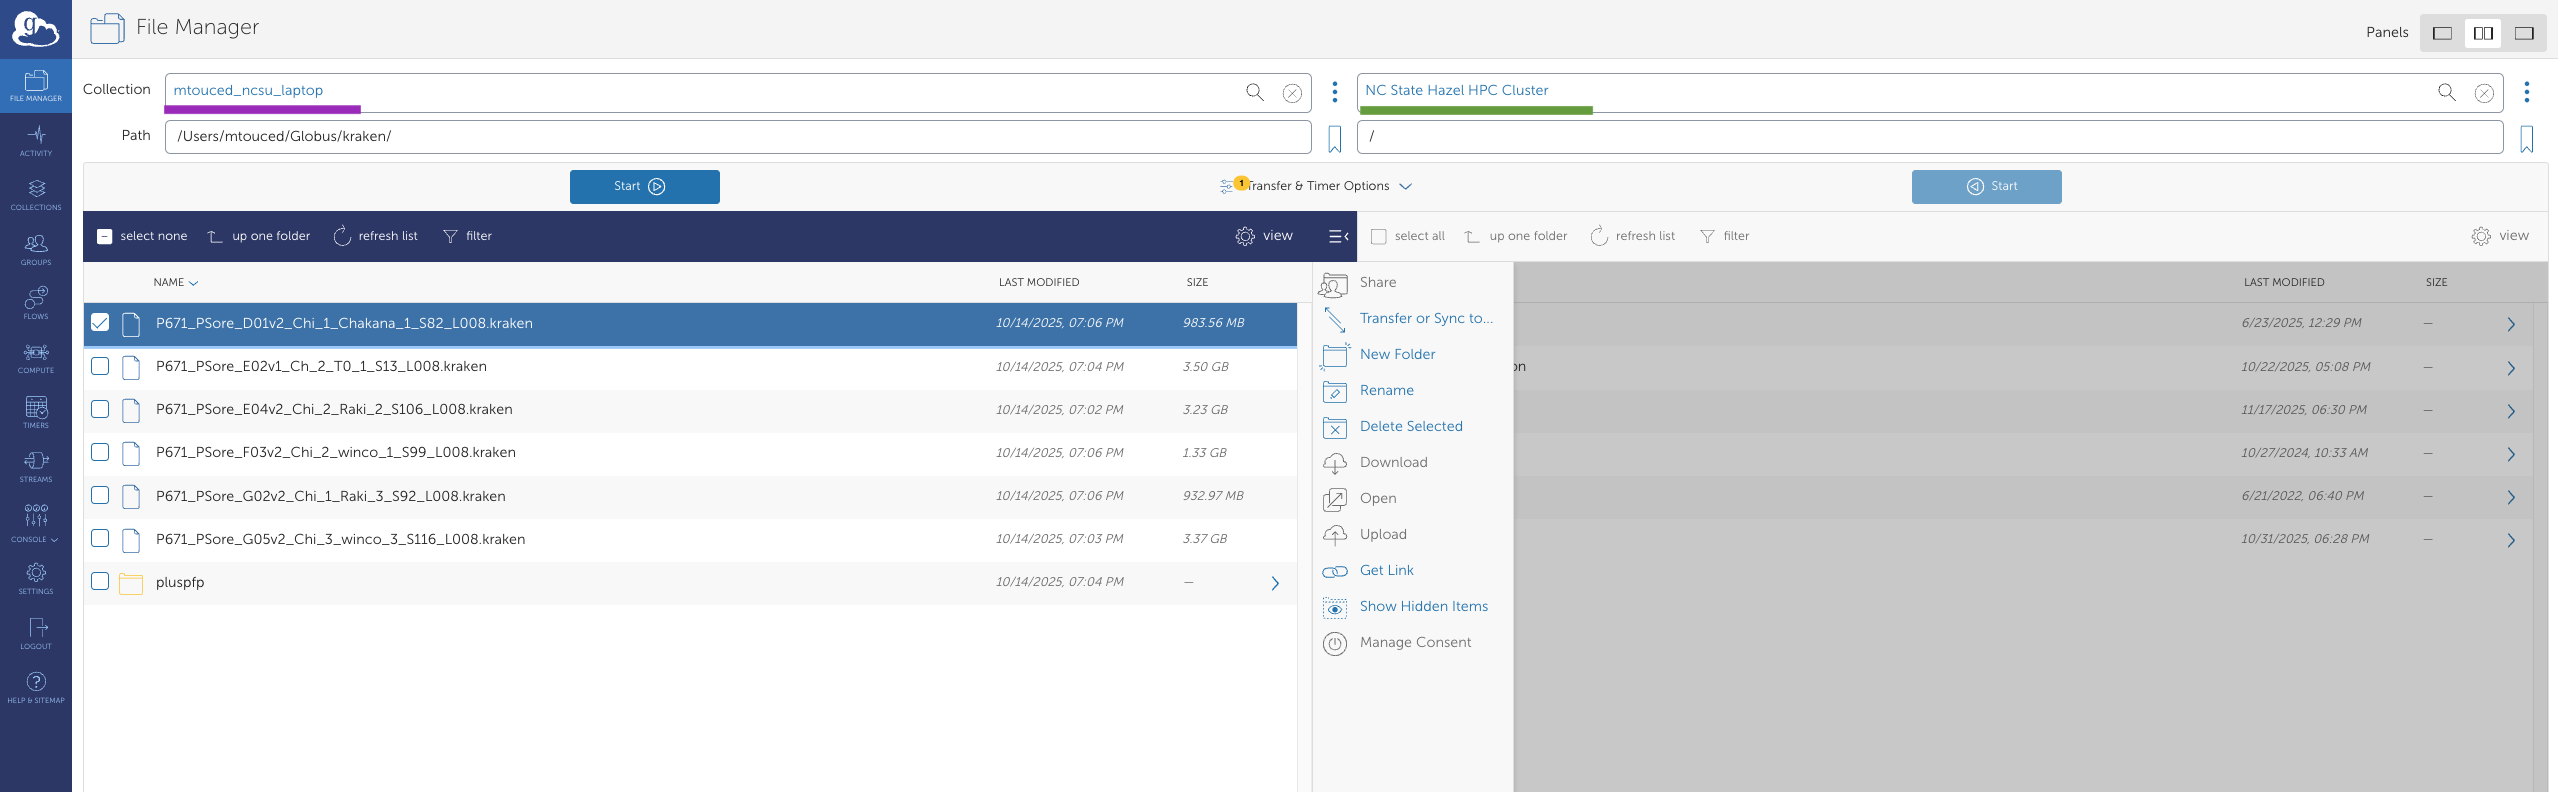
File Manager with source and destination Navigate to and select the files or folders to transfer
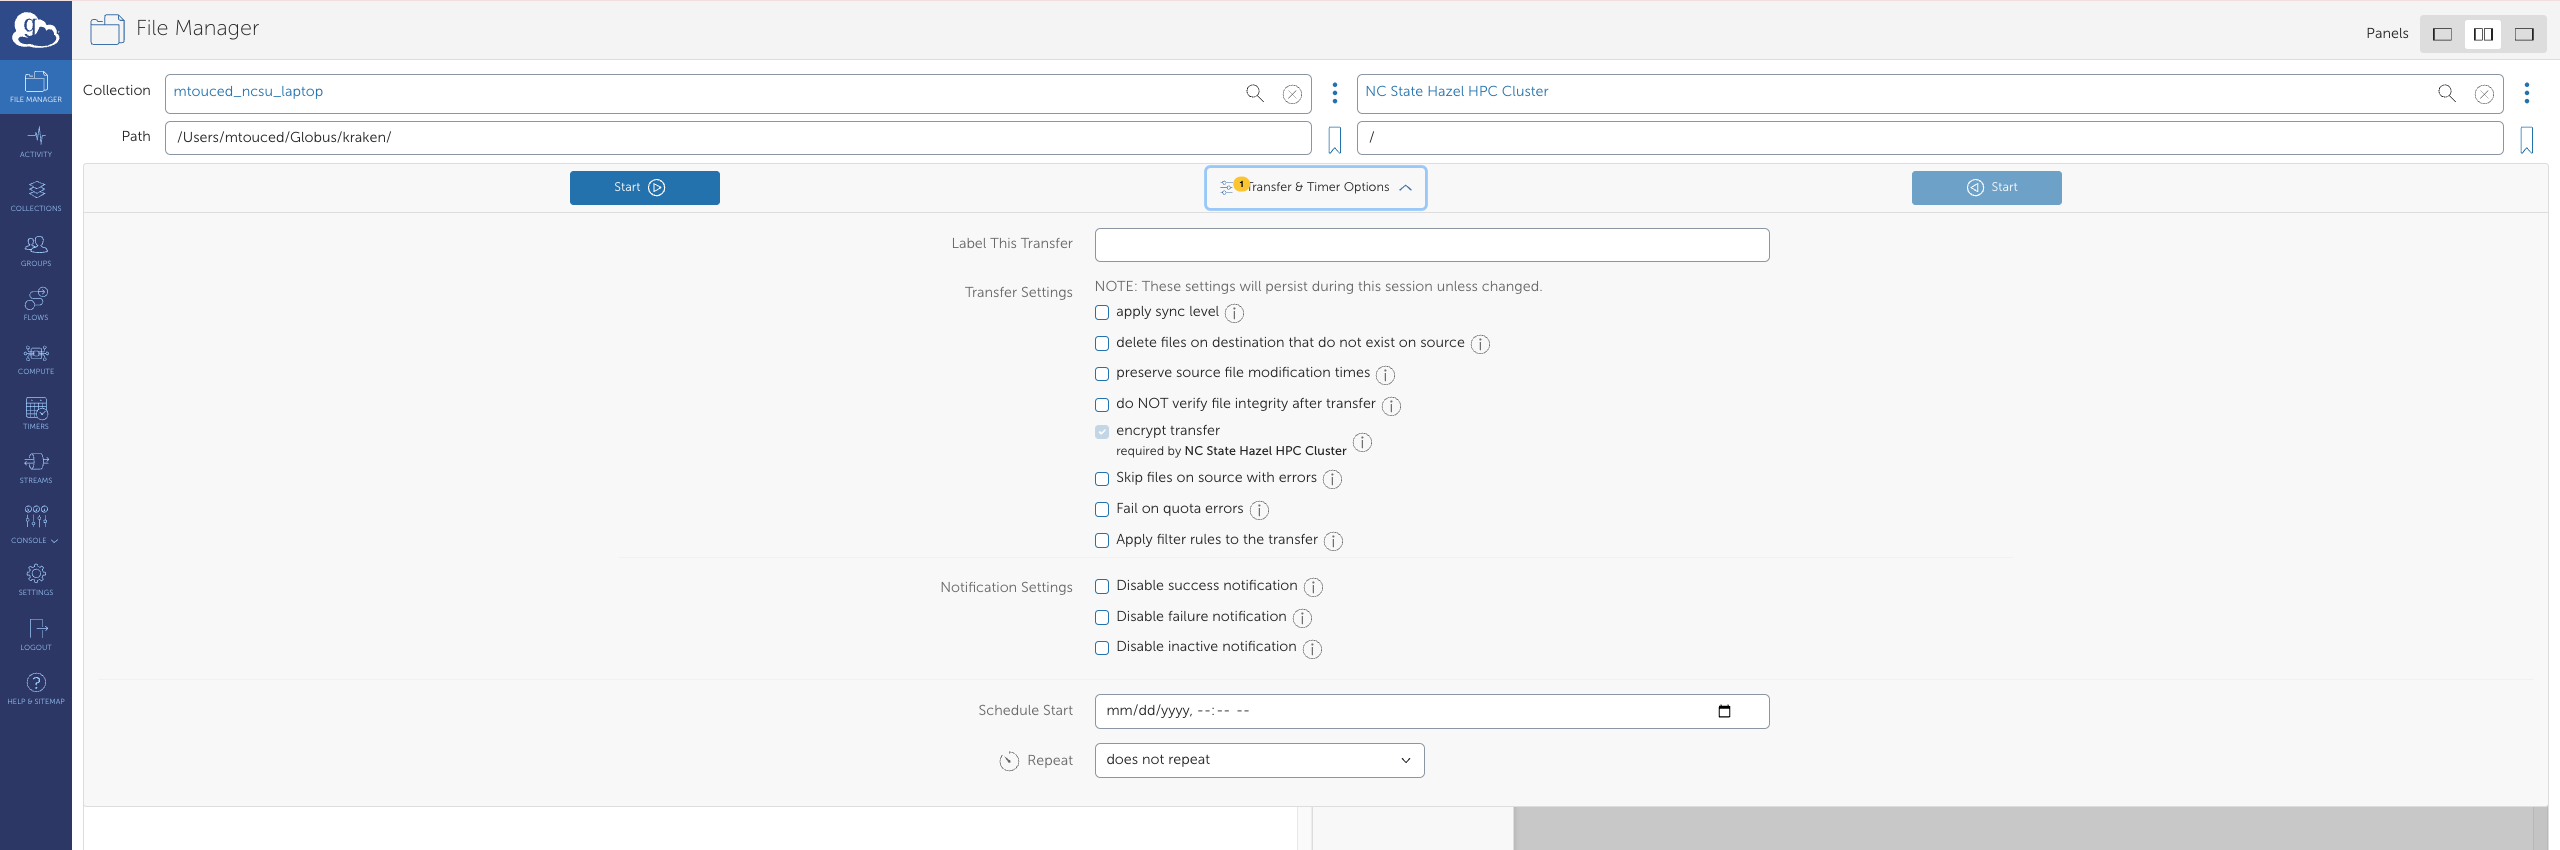
Configure Transfer & Timer Options as needed (sync mode, label, email notification)
Transfer options Click Start
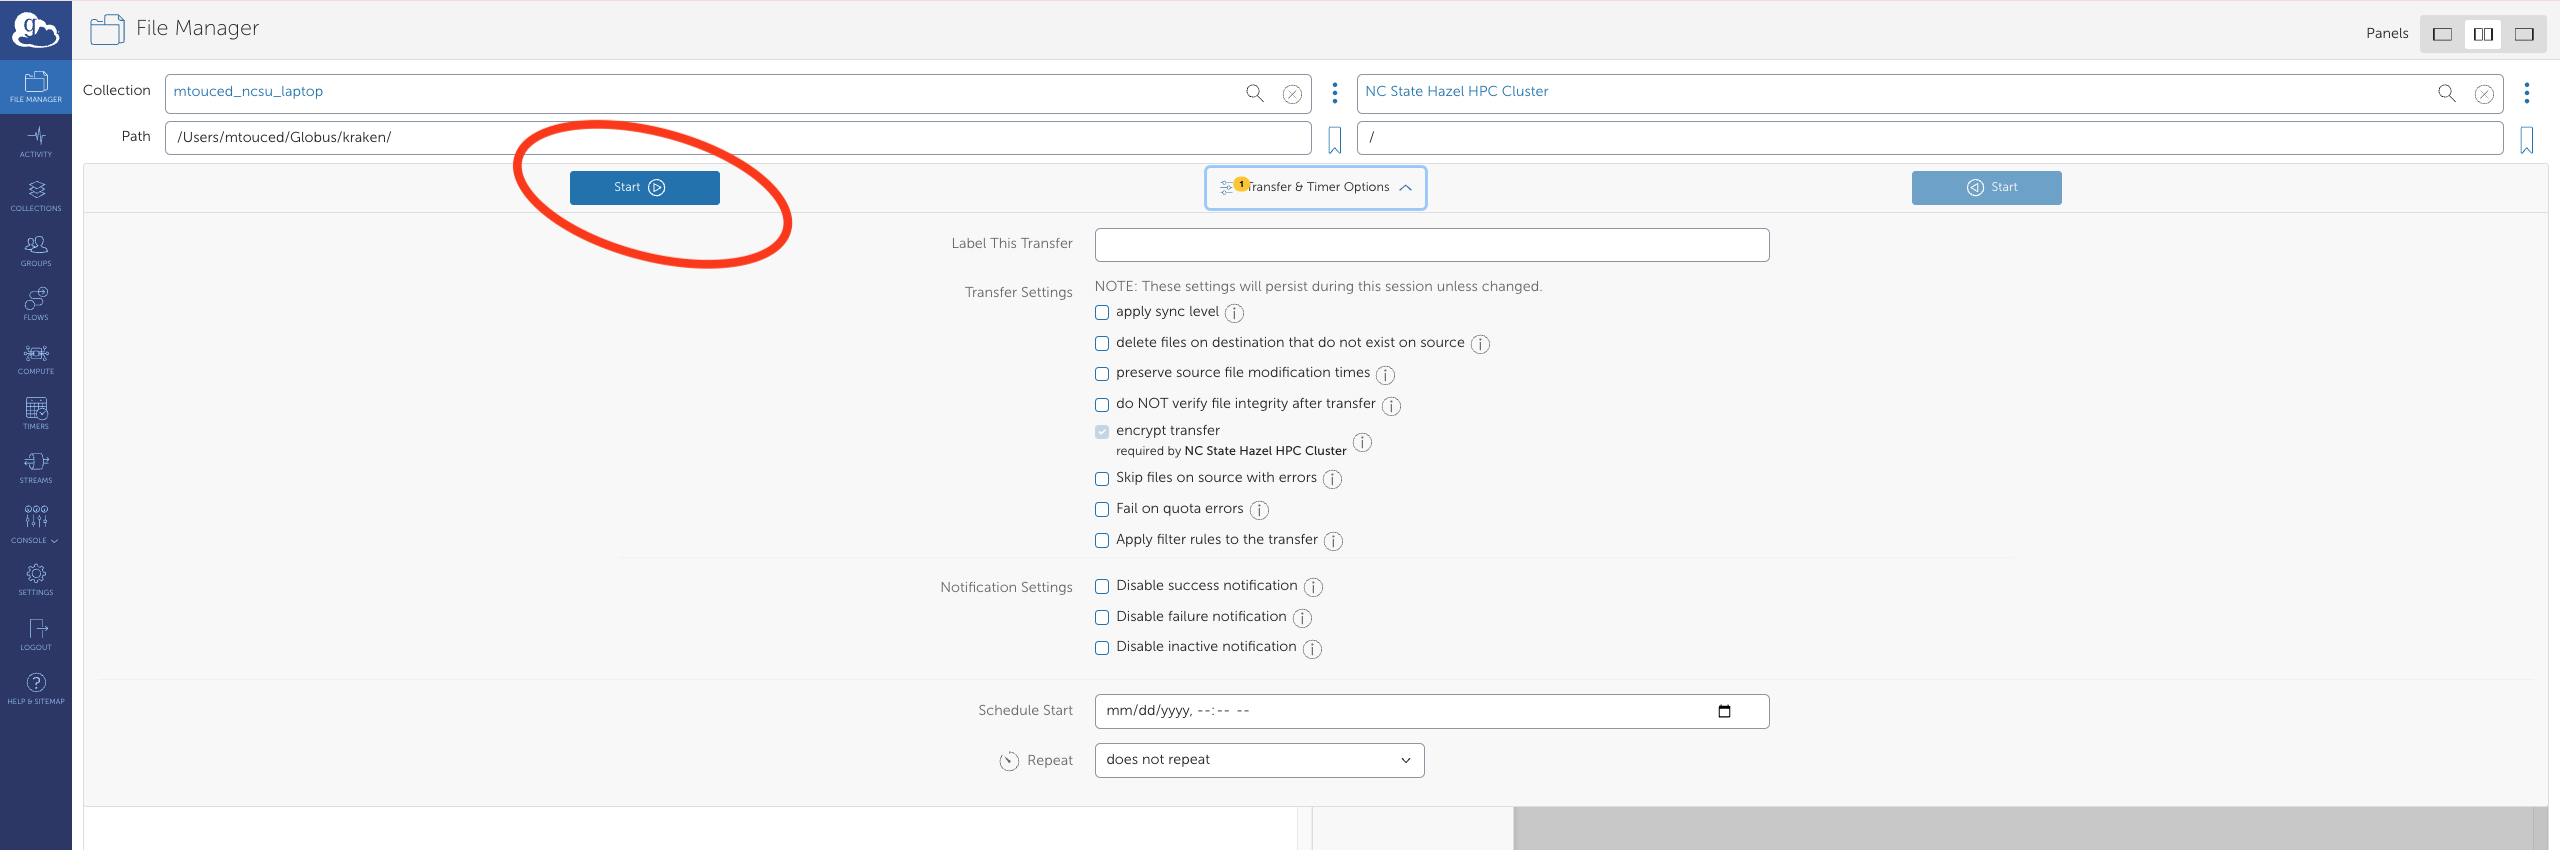
Start transfer button Monitor progress in Activity (left sidebar)
- Label transfers so you can find them in your Activity history
- Enable email notifications for large transfers
- Use sync mode to skip files that haven’t changed
- Check the Activity log after completion to confirm success
9.6 Scheduled Transfers
- Configure a transfer as usual
- Click Schedule Start instead of Start
- Select date and time; complete setup
![]()
9.7 Sharing Data with Collaborators
9.7.1 Create a Shared Collection
Navigate to your collection in File Manager
Select the folder to share → click Share
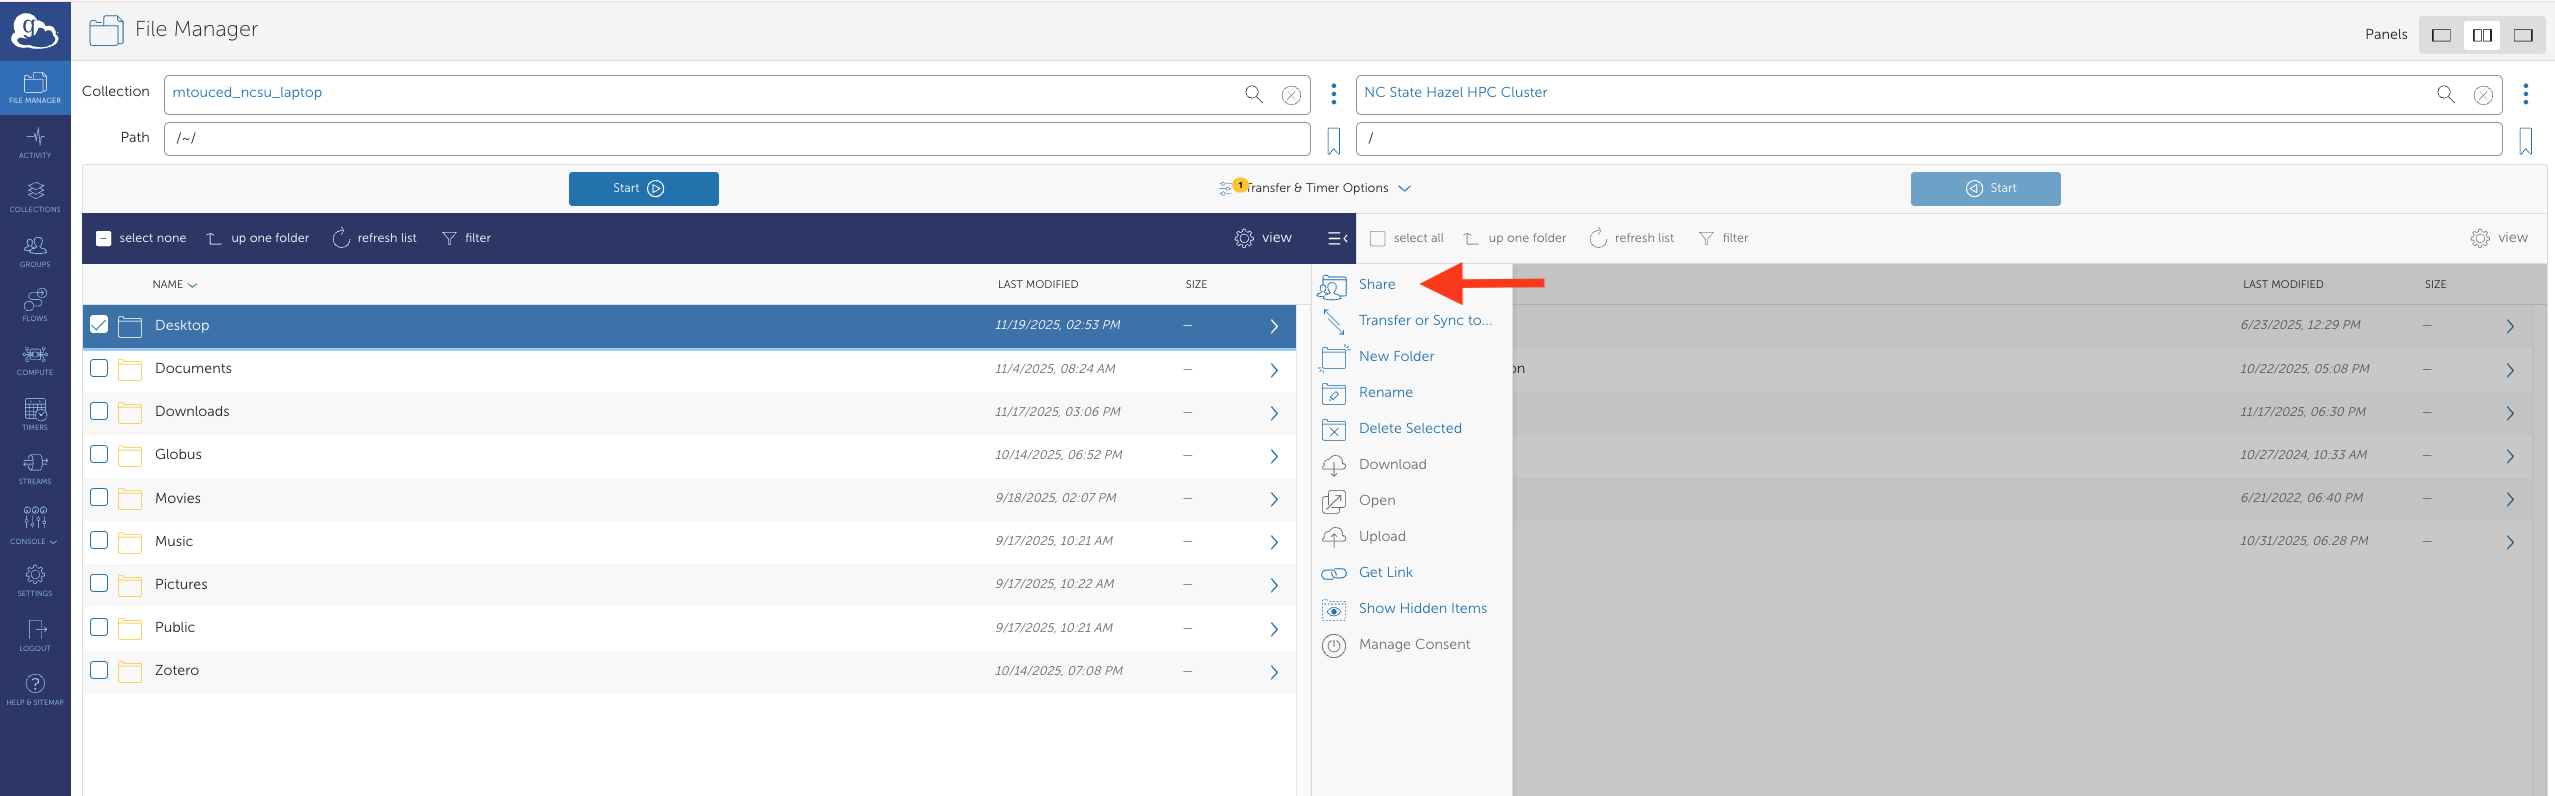
Share collection button Add collaborator email addresses or Globus IDs
Set permissions (read-only or read-write)
Set an expiration date if appropriate
Click Add Permission
Before sharing: verify you have permission to share the data, confirm sensitive data is appropriately protected, and follow your institution’s data management policies.
9.8 Linking Multiple Institutional Identities
If you’re at multiple institutions, link identities to access endpoints from all of them:
Settings → Accounts → Link Another Identity
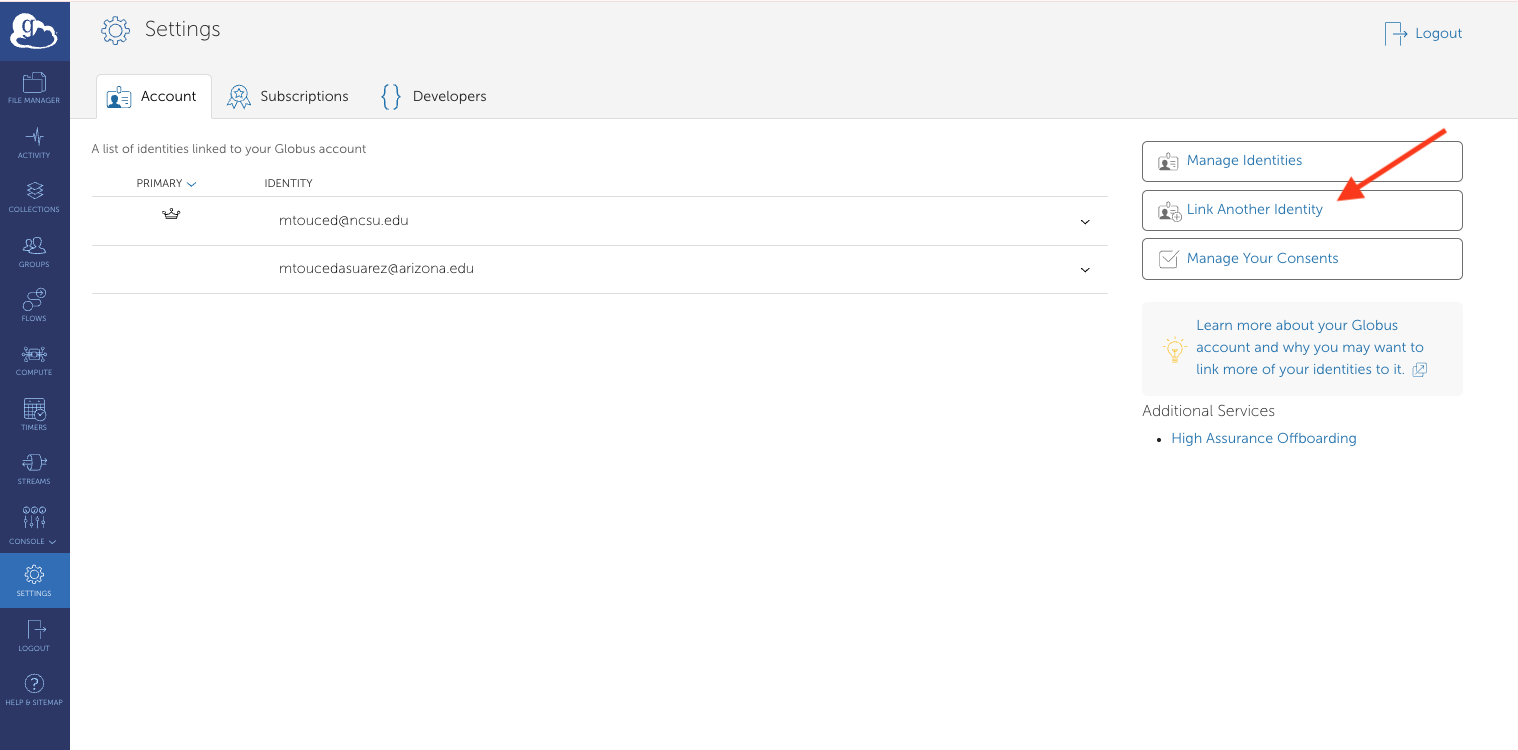
Link identity screen Authenticate with your other institution
Transfer freely between both organizations’ endpoints
9.9 Advanced: CLI and Python SDK
Globus CLI:
$ pip install globus-cli
$ globus login
$ globus transfer <source_endpoint>:/path/file.txt \
                <dest_endpoint>:/path/file.txt \
                --label "My Transfer"
Python SDK:
from globus_sdk import TransferClient, TransferData

tc = TransferClient()
tdata = TransferData(tc, source_endpoint_id, dest_endpoint_id,
                     label="Automated transfer")
tdata.add_item("/source/path/file.txt", "/dest/path/file.txt")
result = tc.submit_transfer(tdata)
print(f"Transfer ID: {result['task_id']}")
9.10 Troubleshooting
| Issue | Solution |
|---|---|
| “Permission Denied” | Check permissions on both endpoints; re-authenticate |
| Transfer very slow | Check network; schedule during off-peak hours; bundle small files into archives |
| Cannot find endpoint | Ensure Globus Connect Personal is running; check endpoint visibility |
| Transfer fails or stalls | Check Activity log for errors; verify storage space; cancel and restart |
| Authentication timeout | Re-authenticate by clicking the endpoint; check if institutional credentials expired |
When contacting support, include your Transfer ID (visible in the Activity log) and a screenshot of the error.
9.11 Performance Tips
- Bundle small files into
.tar.gzarchives before transferring — many small files transfer much slower than one large archive - Sync mode skips files that haven’t changed, saving time on repeat transfers
- Schedule off-peak to avoid network congestion
- Filter unnecessary files (caches, temp files) before initiating large transfers
9.12 FAQ
How long do transfers take? Expect 50–100 MB/s on good connections. Globus shows time estimates in the Activity log.
Can I close my browser? Yes. Transfers continue on Globus infrastructure regardless of whether your browser or laptop is on.
Is there a file size limit? Globus itself has none. Individual endpoints may have limits — check with your sysadmin.
What does Globus cost? Basic access is free for all NCSU users. Globus Plus ($50/year) adds sharing and synchronization features.
9.13 Resources
- Globus Documentation
- Globus CLI Docs
- Globus Python SDK
- NCSU Research Computing Workshops
- BRC support: ncsate_brc@ncsu.edu
- Globus support: support@globus.org